The renderer is even more refined, as are new character animation tools, but some will miss a node-based texturing option
The first thing to clarify is that I was given the full “Studio” version of the package to examine. Not all versions of R12 have all the features we are covering, so please double-check before buying.
It’s All About the Renderer
What’s brand new in the R12 Studio upgrade (in what I think of as the order of importance)? First, the renderer. This is the big one in any software package: if the renderer is problematic or overly slow or complex, you have a problem. At the end of the day, it’s not really how you got the image that counts, it’s how good the image looks and did you finish before deadline. All too often, rendering is seen as a loose end to be done quickly and forgotten. But in real production, this is a huge mistake and can cost you the job. Cinema 4D’s renderer has always been one of its secret jewels and Maxon has sweetened the cache with some welcome refinements. Linear color space is now a default for the renderer, which lets you render a richer and more subtle color palette that is closer to life. This is available in other packages but here it’s easy to use and very fast. I’ve set up similar things in Mental Ray and while it works well, C4D’s is a lot easier.
Another new feature is the inclusion of IES lights, which are basically lights that can use data downloaded from a light company to precisely simulate a given type of light. Why is this useful? It makes life much easier if you are on set and can write down what light was used, then go home and download the IES data from the manufacturer and simply plug it in to your lights. It’s even handier for architectural renders, so anyone in that field may find this pays for the package by itself.
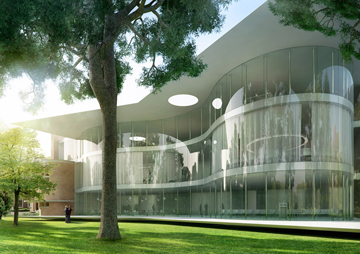
An architectural rendering created in C4D this fall by Antwerp designer Nick Ervink plays up natural light.
I adore the Render Queue. Somebody please tell the other 3D companies to take a look at how MAXON has done this. Finally, a 3D package where you can set it up to render multiple scenes all at once (say, while you sleep…) with no command line stuff, a simple interface and the ability to just fire it off and forget it. Bravo!
True units of measurement: OK, this is a feature that everyone generally says “So what?” about but it’s amazingly important to every major facet of doing 3D work, and surprisingly few programs have it. Most programs, including past versions of Cinema 4D, use a “units” system where the computer may attach an arbitrary label like centimeters, inches, etc., but it calculates everything as “units,” which have no connection to the real world. Again, everyone says “So what?” The value comes in your lighting. By adding true units, you now can give lights the ability to calculate based on real-world distance, making them more accurate (remember those IES lights). True measurement means you can correctly size your dynamics to emulate “real” objects instead of sitting and guessing as to whether the program recognizes your cloth simulation as something the size of a napkin or the size of a bed sheet. True measurement means you can build accurately to size with no guesswork, a boon for all the architectural visualizers, TV show VFX people, product design folks and so on. Again, depending on your job, this may pay for the upgrade. Even if your job doesn’t require it now, one day it might.

New Character Animation Tools
OK, now I’ll stop talking about the renderer… for the most part. So lets roll down and look at something everyone looks at, even if character animation isn’t something most 3D professionals do unless that is all they do: the character animation tools.
The big one, in my book, is the pose-based mixing and morphing system. Now that’s a mouth full, but this thing is a godsend to the character animator or technical director. Imagine you are animating a character and you need a shoulder to move in a way that is unexpected, and suddenly the entire volume of the shoulder collapses in on itself. Without the above system, you scream in frustration and have to go back and re-skin your character (always fun). But with the pose system, the rules change: Now you can place the character/object in the problem pose, tweak vertices around, save out the morph and back you go to animating with the new morph firmly preventing the shoulder from repeating its prior performance. There are also dynamics-based rig systems for stuff like the inevitable “ragdoll” character falling off a cliff thing, but the pose system gets my vote for #1 importance in this upgrade.
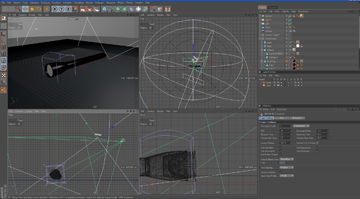
The C4D interface
There are also some new deformers that MAXON doesn’t refer to as “character tools”, but oh, the possibilities. The big one of these is a lattice deformer based on the plane of the camera. In short, if you want a particular deformation (say the “smear” cartoon effect of really fast motion), you apply this deformer and look through your camera and you’ll see a grid in front of your scene. Don’t let it fool you, this is a smooth deforming lattice; you grab the points over a given object, move them and the object distorts: very cool, and to my best knowledge, unique to C4D (though I’m sure there’s a plug-in for it out there somewhere).
The last area we’ll hit is dynamics (although there are many notable smaller enhancements throughout R12). This is a personal hobby of mine, so I tend to get picky with this stuff. The big news is the “Bullet” engine: this thing is fast, generally stable and easy to use and does something that’s normally a misery in most packages: rigid body dynamics. Want to toss a rock through a window without an angry neighbor chasing you down the street? Here you can. Ever been curious about what would happen if you tossed a bowling ball at mach 1 into the side of a building? Now you can find out. The strength here is the simplicity of the system at its “base” level, which expands into as much complexity as you want if you need more control. There are also an array of machine-like relationships (hinges, springs, motors etc) available for building your own “working” versions of whatever you want like, say that 200 foot catapult you always dream about constructing. Careful folks, this stuff can be addictive.
Is this everything new in the latest release? No, but these are the things I think may be the most exciting and important based on my experience in the business.
Questions Answered?
So lets get question #1 out of the way: Yes, I think the new features justify the upgrade, especially the render features. Personally, I would suggest the maintenance contract approach to this sort of upgrading, since it seems very economical in comparison to buying individual upgrades (much like the maintenance contract offered by Autodesk for Maya, 3ds MAX and all the other software they produce.
Question #2: Is Cinema 4D viable for production work? When I approached Cinema 4D, I did so with little prior knowledge of the program but I am quite impressed. Is it perfect? No (and we’ll go a little into that in a moment), but no 3D program is. Period. It works and it works well. Have I mastered it in threeweeks? Not likely, but I have learned enough to wish to go further in investigating this package, and I only do that if I think there is a real value in doing so. So yes, it is quite viable for production work.
Question #3 is a loaded one: “Would there be a reason for a studio to bring Cinema 4D into their workflow?” Studios do not (and rightly so) like to tinker with their pipelines often, but I am thinking that, particularly for smaller studios, or one-person shops, where one is unlikely to have coders available to write “fixes” or tools for anything missing, there is a strong argument to bring Cinema 4D into your workflow. Why? It is simple and fast to learn on many levels and can quickly do things that take more time to set up in other high-end packages. It has an excellent renderer and the 3D paint software, BodyPaint 3D, is thrown in to boot. BodyPaint 3D by itself costs close to the same as the basic (not “Studio”) version of Cinema 4D, and most third-party renderers are at least $800, so that covers a fair chunk of the price right there. I would say, yes, it could be a very worthwhile investment for a company.
That brings us to Question #4. The following advantages and disadvantages of the program are based on my usage over the last three weeks and by my fifteen years experience using other packages; this is only what I see and only at this moment.
So in summary, the good things:
• An easy to use, powerful renderer that looks good.
• Very tight integration with Adobe After Effects, to the point of being able to export scenes into it
• It is very stable, at least as far as I could tell in my tests.
• A simple approach to basic dynamics and rigging that can, however, be expanded to much more complex effects with additional knowledge.
Now for the problematic areas:
•You have to be extremely well organized when modeling and obsessive about keeping to naming conventions or else it is very hard to keep track of what is an object and what is modifier on an object (some show up in the same window as the object list for the scene). I strongly suggest the use of layers to help rein in the chaos.
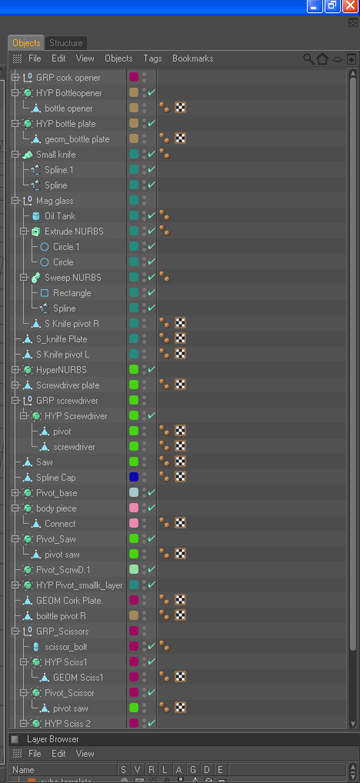
Keeping track of objects and scenes can get confusing.
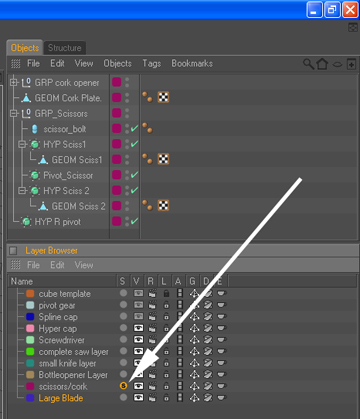
But a layers-based approach may make things easier for you.
•The spline tools are very impressive but the NURBS modifiers turn them into geometry-which doesn’t let you directly edit cvs. To do that, or to edit any object, you must convert it to an editable polygon mesh; the toolset feels unfinished here.
•The lack of a node-based texture system option may be an issue for some. This is one of those love-it-or-hate it things: I prefer using node-based, since I am used to it from working with Maya or Shake over the years. I just find it easier to follow what is happening with that visual approach, but there are plenty of other people who prefer a more layers-type approach to texturing/shading.
While not perfect, this is one powerful suite of tools that continues to get better with every release.
Johannes Huber has worked as an artist in the entertainment industry for nearly 15 years. Past projects include work for Electronic Arts, Interplay, MGM and numerous other clients in the areas of concept design, 3D modeling and sculpting, as well as technical direction and dynamics work. He also teaches concept art, human anatomy for sculpting and Maya at one of the colleges in Houston, Texas.


Leave a Reply