Currently available for Apple Final Cut Pro X, ColorSynth is an elaborate pre-wired network of color-processing nodes. The color-grading tool, which is based on FCP X’s Effect and Title Generator paradigm, has more than 60 items arranged in an eight-layer stack with several sublayers. ColorSynth is touted as having all the features and power of Blackmagic Design’s DaVinci Resolve and FilmLight’s Baselight, while the interface should be simpler than the one that comes with those tools.
The first thing you’ll notice when using ColorSynth is that it renders results instantly — even on my lowly mid-2011 iMac. The interface is conceived so that, if you have a good grasp of color-management as it applies to video and film, you’ll be flying through the job in no time. There’s a keyboard-alike control surface in the making, too. Appropriately called Keys, it wasn’t available yet when I wrote this review, but it will be coming soon. ColorSynth will also be rolled out for other NLE platforms, with Adobe Premiere Pro a number-one priority for the developer team.

Keys, the forthcoming control surface for ColorSynth
Codex
ColorSynth can be used as a title generator. It then serves to color-grade only parts of a clip, stack grades onto each other or grade multiple clips with the same settings at once. The title generator option allows grading on a large scale in a way that is usually only done with Baselight, although this option also comes with Color Grading Central’s Color Finale.
In my early test version, two layers (ColorSynth uses a layered approach internally) were still ghosted: “Shapes” and “Look.” These are special add-on modules that are planned to come later this fall. Because Codex wanted to release ColorSynth in its current state as a pure color-grading toolset, it also lacks support for CDLs, HDR and auto-clip matching, but Philippe Panzini, VP user experience, told me these specific tools are well underway for release in the near term.
Not What You’re Used to with Resolve or Baselight
ColorSynth is divided into sections with tabs, and buttons that serve as on/off switches. The interface is extremely user-friendly. The color-grading tools don’t use the traditional wheels but rely on curves and color cubes. Color eyedroppers are found in almost every modifier tool, making it easy to select the color you’re targeting. If you want to see how your footage looks before and after, there’s an easy to use A/B feature that will also accept a reference frame. Then, you can either use a slider to see the effects or put the reference and the active frame next to each other. Changes made to any of the parameters immediately showed up in the Viewer panel, even on my iMac.
In Input Grade mode, you can work with color temperature, linear adjustments (lift, gamma, gain and offset), exposure (to change RGB balance, actual exposure, saturation, and contrast) and a tone curve. The RGB controls follow the printer lights model (the way film labs controlled exposure and white balance) and allow adjustment of the relative densities of red, green, and blue for the layer.
The tone curve allows you to tune contrast and colors in the traditional way, with granular control over shoulder and toe.
By the way, I noticed throughout my tests that most of ColorSynth’s controls only work on the parameter you are changing and nothing else. If, for example, you’re using the luma curve to increase contrast, you will not be changing saturation in any way. (You usually are with other systems.) This is a characteristic of a good color-adjustment system. It’s tempting to add saturation, though, because that is simpler to implement and indeed fools the eye into seeing more contrast. The downside is that it may severely limit your grading choices downstream.
In Output Grade, the modifiers you have access to are color tone and “special tools,” in addition to the ones above.
The Color Tone panel allows you to define separate RGB curves with a default mode that adjusts the colors without affecting brightness and an option to change the relative intensities of RGB channels, thus affecting both colors and brightness.
The Special Tools panel offers controls for vibrance and clarity, the latter controlling local contrast.
Where ColorSynth Really Shines
Another layer is Selections. The qualifier of this layer is a high-quality chroma-keyer used for color isolation. Six color vectors are predefined and can be modified. Each of the six separations has its own set of modifiers. The chroma keyer is very detailed and allows you to affect only the specific color you want to change. You can pull a primary key and two auxiliary ones, which in my experiments was more than enough to isolate a particular shade of blue on a blue T-shirt.
In fact, I used only the primary key to get rid of some noise in a GoPro Hero6 clip shot at dusk by modifying the two modifiers (linear functions and exposure). That was a first; I could never do that with the other color grading plug-ins I have reviewed, nor with Final Cut Pro X’s own color tools.
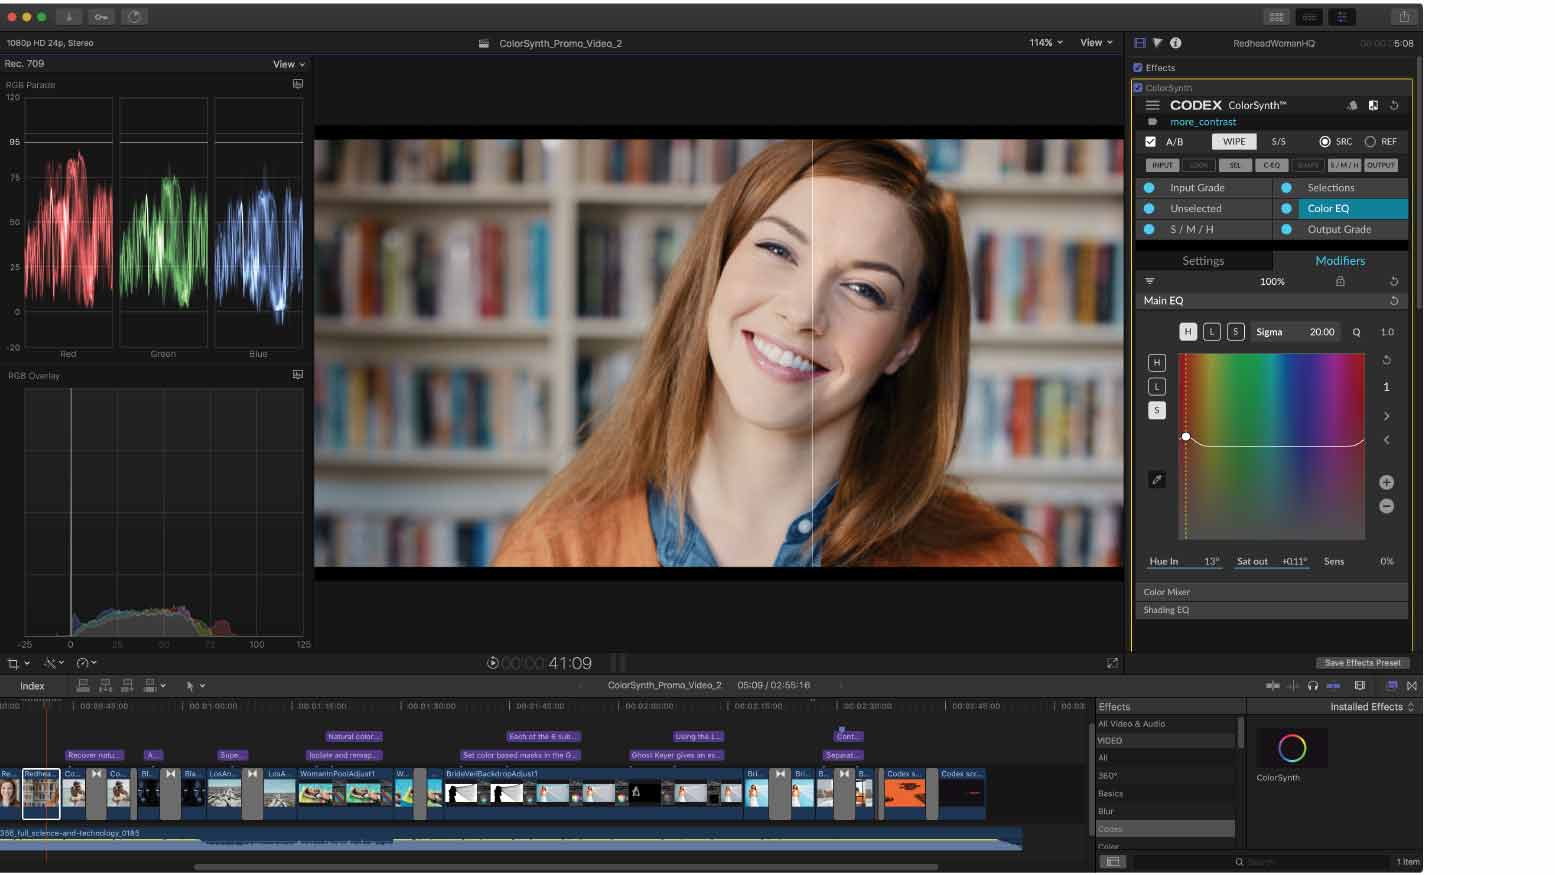
ColorSynth’s Color EQ color-remapping tools are easy, intuitive and highly accurate.
Codex
A unique layer called Color EQ allows the adjustment of hue, saturation and luminance relative to each other or themselves. Three sub-panels allow different types of adjustments: Main EQ, Color Mixer, and Shading EQ. The remapping capability isn’t unique by itself, but the interface and accuracy of the selections are. Contrary to hue-vs.-hue remapping in Resolve, for example, I found using the ColorSynth layer easier and more intuitive.
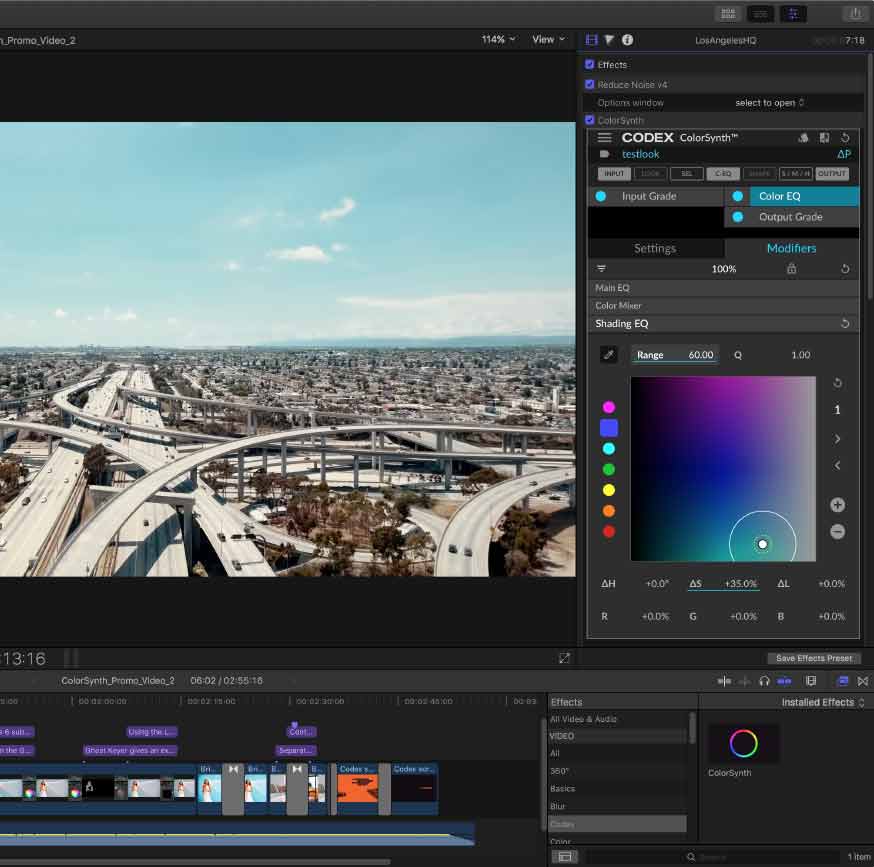
The subpanel called Color Mixer does more or less the same as the mixer in Photoshop. Finally, the Shading EQ sub-panel allows you to target a very specific color for the modification of hue, saturation, luminance, or RGB tinting. This panel allows you to narrow down the range of colors affected by the change to a much smaller area than is possible with the Main EQ panel.
My Conclusion
Although it lacked some of the functionality that will be added soon, my test version of ColorSynth 1 really did turn Final Cut Pro X into a full-blown color-grading environment. The interface is novel and more helpful when it comes to seeing where in the color model you’re applying changes than the traditional wheels-and-sliders interface. A generous set of keyboard shortcuts makes working with this plug-in a pleasure, and the omnipresence of eyedroppers allows for a fully color-managed environment, provided you use a color reference card.
I don’t feel the absence of a scanning feature for such cards is a disadvantage. On the contrary, the eyedropper functionality actually gives you the freedom to use cards that aren’t supported by other grading tools, such as my DSC Labs ChromaMatch card.
The quality of the feature set, the rendering speed and the results you can obtain with ColorSynth can easily compete with Resolve.