"Fix It in Post" Tests Power of Color Correction and Forces ADR on Location
But the challenges were just beginning after the Super 16mm film was in the can and the compromises made during production had to be faced head on, and still with very little money. This meant spending a lot of time in the DI and doing over 2,000 lines of ADR on location. Yes, ADR on location. But more on that later.
Any producer would look at this and immediately think a few things: multiple locations, scenes in a moving vehicle, day and night scenes. Not cheap. But yet Sibay was able to shoot it in 18 days and the film is finished all for under $60,000. Sibay estimates if all the services donated during production and post were paid instead of volunteered (or the hopes of backend compensation) the film would have cost around $1.2 million, still a pittance in film terms.
“We didn’t have any dailies printed and Michael shot the movie on blind faith trusting the DP Tobias Datum. A lot of the stuff was handheld, the videotap was really never working and they didn’t have the money or time to look at dailies everyday," says Cote. "Eventually we knew we wanted to end up with a 35mm print. So we talked with a bunch of post houses and we ended up going the HDSR route, which allowed us to digitally finish and maintain the quality enough that we could comfortably go out to 35mm. So at that point, when the picture was locked we had to retransfer the selects from the negative to HDSR tape.”
DI colorist Tyler Hawes, co-founder/senior colorist of Liquid Digital Intermediates (www.liquidcompanies.com), who also served as a producer, was brought on after production and determined that they should go with an Apple workflow, using Shake for the visual effects and Final Touch (since bought by Apple and rebranded as Color) for the color correction. For Cote, this meant taking the HDSR footage and re-cutting it according to his Avid EDL in Final Cut Pro so that the workflow between the departments would be smoother.
“The only thing that is really tangible to me as a colorist between those two options is that I don’t have the freedom to move up and down in the negative so we had to be sure about framing when we did the telecine. But it costs so much less than scans and we saved tens of thousands of dollars going that way. Since the BetaCam dailies showed the full frame of the negative Glenn Cote put a letterbox mask on everything and watched it again with that mask and then made notes on what shots were going to need to be bumped and adjusted in the telecine. So Glenn supervised the telecine so that we could just reposition a few shots to get the framing correct because once you get it to tape you only have the flat 1.85 extraction from the film, which is fine because that is what we are releasing.”
With the picture locked, they went back to the transfer house to transfer the film to HDSR tape. Conventional wisdom says that at this point you only transfer the selected footage. But this is not a wise decision says Hawes for a variety of reasons, the first being the cost.
“We needed to keep the number of hours in the telecine room down because that wasn’t free. The traditional route for scanning and even for telecine is that you scan selects so that the operator of the telecine machine has to find punch in and punch out for every single selected shot. The benefit of that is that it gives you organized material that is more succinct, you don’t have to look at everything. But the ironic thing is that you can actually scan everything from a film faster than you can typically scan selects, unless you have a really high shooting ratio, because the telecine operator spends most of their time going through the shot, finding the correct keycode, punching it in and punching out. Eighty percent of the telecine operator’s time is spent cueing up takes. By transferring everything, they can just breeze through it.”
The other benefit of transferring all of the footage is that it allows you to make changes and fixes later on without having to return to the telecine room.
“We always knew that there was the possibility of making changes later or there even can be problems in your edit list when you do selects, which happens more often than not and no one is aware of until you start getting into the conform and DI," explains Hawes. "In those cases you have to go back and rescan those things. That typically means you have to pay for a full hour to transfer one or two shots but you have to pay for those one or two shots so that’s a waste of money. Having everything scanned to HDSR tapes the worst case scenario is we pop it back in the SR deck.”
“We’ve been using Final Touch since the first version and the main thing we had to do was learn some XML so that we could work around bugs in the Final Touch system. Once we had those issues handled it is a smooth workflow and one that we’d tackled many films ago.”
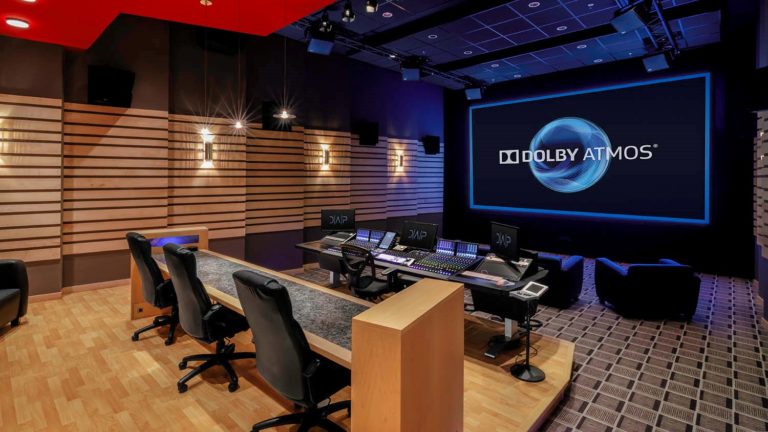
Furthermore, Hawes contends that using a less expensive solution such as Final Touch often will lead to better results even though, he warns, it still isn’t cheap as all the supporting hardware in a professional grading suite still costs a lot of money. Liquid Digital's grading suite is outfitted with top of the line tools with 15-foot-wide screen with 1080p DLP projection, JBL THX sound, and 25TB of SAN storage connecting their workstations.
“The rate on a desktop color correction system is maybe around 30 percent lower [than a traditional color correction suite]. What ends up happening is you usually end up spending an extra 30 percent in time during the color correction process getting the look right and creating a better product. So that extra time you have at the reduced rate allows you to really nail your look, instead of rushing through the color correction process because the rates are so high.”
Hawes had to deal with a ton of footage that was not well lit, though due to no fault of the DP.
“We had a great DP and sometimes we had only two hours to shoot a five-minute interior scene, so there was no time to create an elaborate lighting set up or even gel the windows," explains Hawes. “So there were scenes where the actors were down in the shadows of the dynamic range and bright exteriors through the windows. We knew that we were going to have to boost the actors and that would give us noise and grain. So the real thing we had to crack creatively in the DI was how we were going to brighten the actors and not have it be so noisy and grainy that it looks ugly.
“For a while we tried fighting the grain but in the end we had to embrace the grain and make the grain our friend. It took us weeks just of playing around, not because of inexperience, just because of the extreme challenge of those scenes, until we found the silver bullet of a combination of curves and filters to create a look and aesthetic that would allow us to get those shadow details back and add a gorgeous fantastic look to the film.”
Adds Sibay, “It became part of the style so that it looks intentional. Even if we’d spent millions shooting it the look we have could be interpreted as a choice. Limitations often can be a blessing.”
“In any given situation we didn’t have tight control over the environment,” explains Supervising Sound Editor Vince Tennant. “We shot in a hospital that was an operating hospital, in a restaurant while customers ate, next to an airport. Also, because this is a road movie a large portion was shot inside a moving vehicle. Obviously in a larger budget you would tow the vehicle or work around it in another way. So things as they were, the camera crew was in the Hummer, which is a loud vehicle to begin with, along with the rest of the crew and the actors. So the production sound guys had an uphill battle and we ended up having to scrap a large portion and go back to the drawing board.”
But ADR is expensive. While Tennant was volunteering his time as the ADR supervisor, the real cost would come during the mix when the ADR dialogue recorded on a stage needed to fit in the various environments of each particular scene.
This was money they did not have.
“[Director] Michael [Sibay] had seen a documentary on the work of Akira Kurosawa, who had long-time problems with the quality of stage ADR," recalls Tennant. "So he approached setting up ADR on location and doing the ADR in the natural environments where the material was shot. So we thought if they could do that 30-40 years ago why can’t we do it? So Michael met with the original sound supervisor Chris Pinkston and they hashed out a plan on how to do that. From a technical standpoint it was a great idea. Having a lot of ADR creates a lot of problems. All of that material has to be treated in order to sound natural. It has to be reverberated and taken off of the stage and placed in the environment. So the process of getting the ADR right in the first place was extremely appealing.”
The portable ADR rig included a Mac Mini, Steinberg Nuendo sound software and production microphones used during the shoot. They brought that rig with the actors back to the original locations or to different locations that had the same relative sound space as the ones on the shoot.
“We were able to do everything you do in a normal ADR studio: we had video playback for the actors, all of the synching material, we were tracking straight into the digital environment. We basically rolled in with a small cart, worked with our actors for several hours, got the lines knocked out and moved on.”
Why did they use Nuendo instead of Pro Tools?
“Nuendo is similar to Pro Tools but Nuendo had a couple advantages in that it deals with timecode natively in the environment whereas Pro Tools requires an extra hardware investment to be able to do timecode properly. With DigiDesign products you are locked into their hardware whereas with Nuendo it’s more open in terms of what types of converters you can utilize. Nuendo also supplies a video playback out of the Nuendo timeline as well as was able to track, supply all of the preceding the beeps, and play the original guide track from the production for the actors, all running off a Mac Mini about the size of a lunchbox.”
And so when they went to mix the dialogue it only needed a little work to fit into the scene and the re-recording mixer could concentrate on salvaging some of the dialogue from the production track.
- Hire experienced people even if you don’t have the money to pay them. “If we’d gotten together a rag tag group of amateurs it wouldn’t have worked. Hire people that know what to do with the time and are willing to defer monetary compensation. Even with a low budget film it doesn’t mean you are constrained to looking at the bottom of the barrel for talent, it just means you wait and find the right people. ‘ Tyler Hawes
- Transfer all your footage to HDCAM SR tape. “I would really advocate for anyone shooting in film on an independent film by far the smartest and easiest workflow is just to transfer everything to SR from the get-go and if you are on Avid use the DNxHD codecs or on Final Cut use ProRes so you have a high quality compressed image. Then when it comes to your DI it is as simple as a tape conform. The funny thing is that people think doing dailies on HDCAM SR is more expensive and yes HDCAM SR dailies cost thousands more than DVCAM dailies but if you look at the whole chain of the film you get that money back in many different ways. One way is that is if you are going to transfer everything why not just transfer it for your dailies as well. The other aspect is that if you are able to see everything at high resolution you’ll know about issues such as focus, reflections and shadows from the beginning rather than getting to your online and DI where you are finally looking at it in high rez and now you are kind of married to it because it is too expensive to go back and change the edit. ‘ Tyler Hawes
- Modern workflow. “Make sure to find people that embrace a modern workflow. We worked very well in a digital, file-based workflow between departments all down the line so we saved a lot of time and also a lot of money in just little things like tape costs and shuttling things back and forth. Things have been moving that way for a while but I’m still surprised that a lot of the studios are still working in more traditional, cumbersome ways."
- Hire a script supervisor. "Because there was no script supervisor we wasted a lot of time organizing a lot of the footage and putting proper scene numbers to every clip. A little money you spend on having a continuity person saves a lot of money down the line. Because we didn’t have a script supervisor I had to organize all that material. One of the tools I used in Avid is the script based editing software, which a few editors I know use but it’s not as widespread as I would have thought. I found it a very useful tool." ‘ Glenn Cote
- Concentrate on your production sound. As infuriating as it can be to sit around and wait for n airplane to pass, or to find the root of a buzz or hiss, the time it takes to re-record it and fit it back into the scene without the viewer noticing are much, much greater. And hire a production sound team carefully.
Did you enjoy this article? Sign up to receive the StudioDaily Fix eletter containing the latest stories, including news, videos, interviews, reviews and more.


Leave a Reply