Shorten your compositing time with a filter that combines chroma key, spill suppression, matte choker and a light wrap compositing step under the hood.
In Final Cut Pro, place a greenscreen clip in the timeline and apply the BCS Chroma Key Studio filter from the BCS Keying category. BCS stands for Boris Continuum Shaders, signifying that all BCS filters are implemented using “shaders,” special code for programmable GPUs.
Next, pick the backing color with the eye drop tool. Zoom in on the backing area of the greenscreen clip; we can see that there is a fair amount of noise in the green color. The keyer will have no problem with that. There is no need to pre-process the clip to reduce or remove the uneven luminance. In fact, such noise is normal and the keyer is already designed to deal with it.


Immediately, we see a near perfect key pulled in one step. But we can further refine it with the aid of the matte view from the View pop up.
TIP: Make sure to check the enable the Chroma Key checkbox to enable the keyer part of the filter.
Step 2 Clean Up with the Matte Lightness Control
Even though the key is near perfect, we can see some print-through area near the top of the talent’s head. Black hair can be challenging to chroma key algorithms because black colors carry little color information. But we can still fix it with the additional controls provided by the filter. Slightly increase the Matte Density parameter to remove any dark areas from the foreground matte.

You’ll see that the backing solid black is no longer solid but splattered with whitish noise. This is the noise we were seeing on the original green color backing. We can fix this problem with ease by employing the Matte Lightness control. Note that even though we pushed the Lightness parameter higher, the foreground area remained solid white. And that was our goal in pulling a perfect key: background black (or transparent), foreground white (or opaque).

That’s all the tweaking you will most likely have to do. Honest! The filter does all the magic under the hood. And the Spill Suppression step is automatically applied although more control over spill is available with the three Flare parameters. In our clip there is a bit of green spill still visible on the edge of the hair. Dropping the Flare Ratio parameter to 0.4 removes the last trace of it. Had the model been blonde, we would have seen more green spill on her hair in the original image but the filter would have taken care of it with ease.
Step 3 Pass Preview and Just Hit Play
Now comes the most exciting part of the Chroma Key Studio: the incredible processing speed. To ensure that there is no print-through on the key we need to playback the clip and visually check the results over the entire length of the clip. With all software filters that would require a render or preview to RAM step. But not with Chroma Key Studio. We only need to ensure that our timeline is set to Unlimited RT and press the play button.

Step 4 Refine Your Edges
Now that we are certain there is no visible print-through on our key it’s time to refine the edges and improve the compositing over the background. Switch back to the Matte view and enable the Matte Choker checkbox. Immediately, you will see smooth, anti-aliased edges of the foreground subject and further improvement of the white and black matte areas.

In our case, any further adjustment of the matte would be overkill, but the Radius parameter and Choke Amount are still available to deal with more challenging cases.
Step 5 Tweak Your Lighting
The last step is the Light Wrap. It’s a widely used compositing trick, an absolute must for creating convincing keys over live backgrounds. It solves the problem of hard, opaque edges that quickly give away the magic of chroma key composites. The trick involves a reflection of background video on the edges of the foreground subjects as though they were part of the same scene and lit by the same light.
Enable Light Wrap with the checkbox and switch the view mode to Light Wrap Only. That will let you observe the Light Wrap processing without the foreground image composited yet.
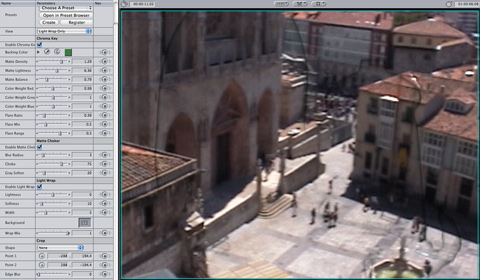
You can see that the light wrap contour is monochromatic black. That would be correct if the final background was just black color. But in most cases, backgrounds aren’t all black. We need to paint the reflection with the actual background image. This is done with the help of a Background “well.” Simply drag and drop the background clip from the Timeline window over to the Background well.
TIP: To erase a clip from a well, left-click on the well and choose Clear from a contextual menu.

It is even easier to observe the light wrap with Light Wrap On Black mode from the View popup. Here you can see that the light reflection colors are sampled from the background image live.

Step 6 Apply to Multiple Frames
Of course, the final adjustment should be done over the final composite, stepping over multiple frames in different parts of the clip. To achieve that, switch back to the Composite choice of the View popup.

Watch a full video tutorial here:
Your Guide
Boris Yamnitsky

Boris Yamnitsky is the founder and president of Boris FX, a Massachusetts-based software firm that brings effects and graphics tools to the video post-production and broadcast markets. An emigrant from the former Soviet Union in the 1970s, Boris received a degree in Mathematics from Boston University, where he concentrated in Theoretical Computer Science and Linear Programming. In the early 1990s, working as an engineer at Media 100, Boris took part in the first release of Media 100, Version 1.0. In 1995, Boris Yamnitsky started Artel Software, creator of the popular Boris FX plug-in products. Boris FX became the first plug-in package for systems such as Adobe Premiere and Media 100, launching the now-vibrant NLE plug-in market. In 1998, in cooperation with Avid, Boris FX introduced the first-ever AVX plug-in product for Avid systems. The company has grown to serve hundreds of thousands of video editors worldwide. All company products benefit from tight integration with video editing and composting software from market-leaders such as Adobe, Avid, Apple, Autodesk, Grass Valley, and Sony. In 2005, Boris FX merged with Media 100 and moved its headquarters to Marlborough, Massachusetts.
Boris Says Keep in Mind…
If you don’t already own Boris Continuum Complete 6 FxPlug, you can download a free 14-day trial version here.

Did you enjoy this article? Sign up to receive the StudioDaily Fix eletter containing the latest stories, including news, videos, interviews, reviews and more.


Leave a Reply