Step 1 Choose Your Room Location
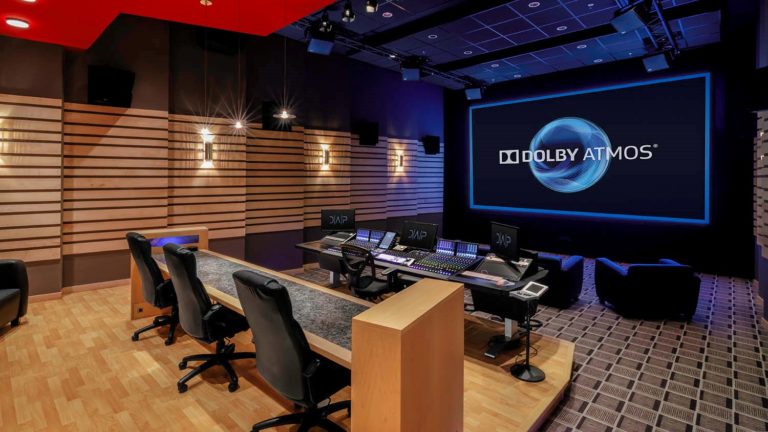
Location, location, location…Choosing the right location for your editing suite is arguably the single most important decision you will make and making the right decision could save you a ton of money and time. If possible, do not place your editing suite next to the mechanical room or an elevator shaft and avoid exterior walls and windows next to train tracks, busy streets or airports. A room that’s shielded from adjacent rooms by a hallway or closet is ideal. Take advantage of the floor plan layout and put thought into potential noise producing areas so they can be avoided.

Step 2 Optimize Your Room Dimensions
The interior dimensions of your room are vital to the way the room reproduces sound – especially low-frequency energy. You should avoid room dimensions that are divisible by the same number or by each other. For example, a room that is 12 x 16 x 8 feet is not a good choice because all three dimensions are divisible by 2 and 4 and two of the dimensions are divisible by 8. This will cause excessive mode issues that yield build up and cancellations across the frequency range. A better choice would be a room that is 11 x 15 x 8 or something similar.
Step 3 Assess Isolation Needs
Once you’ve chosen your room, check common areas for sound leakage. Sound travels like water, so envision filling your room up with water – the areas where the water will leak out are also areas where sounds will travel in or out of the room. Common problem areas are doors, windows, HVAC ducts and drop-tile ceilings. Doors should be treated like external doors and be made of heavy materials that are sealed properly around the edges. If possible, windows should be double-paned with laminated glass, and HVAC ducts can be lined with ductboard to reduce reflected energy from traveling to adjacent rooms. If there is a drop-tile ceiling in the room and the walls do not travel all the way to the hard ceiling above, adding thick, dense insulation above the drop-tile is extremely important. For more information on sound isolation, visit www.acoustics101.com.
Step 4 Determine the Location of Your Mix Desk
One of the most important aspects of sound editing is to have a room that is symmetrical. This is important for imaging and panning decisions that are made during the mixing process. If you are sitting closer to the left side wall than the right side wall, your decision-making ability is impaired and the mix will not translate properly outside the room. For this reason, it’s important to choose a location for your mix desk that optimizes the symmetry in your room. The best location for your desk is facing the center of the shortest wall, so that the speakers transmit down the longest dimension. You’ll want to avoid the corners of the room at all costs as low-frequency energy builds up in the corners and will create an unnatural representation of how much bass should be added or taken away from your mix.

Step 5 Set Up Equipment/Speakers
It’s important to place your speakers at least 12 to 18 inches away from the wall to minimize the effect of Speaker Boundary Interference Response (SBIR). This phenomenon occurs when a speaker is located too close to a wall and results in reflections from the wall surface that can either enhance or cancel the sound waves being emitted from the speaker. This is especially true for low frequencies.

Step 6 Isolate Your Speakers
All objects have a resonant frequency. When the speakers in your room are resting on a shelf or a desk, or on the floor, in the case of a subwoofer, the speaker will vibrate the surface and in turn the surface will vibrate the speaker. When this happens, energy is lost in the structure and the speaker does not react the way it was intended to perform. Isolation devices developed by Auralex, such as MoPADS and SubDude, will decouple your speakers and subwoofer respectively, resulting in a purer tone and reduced sound transmission.

Step 7 Locate First Reflection Points
These first reflection points can be easily identified by using the “mirror trick.” This requires you to sit in the mix position chair while you have a friend move a mirror along the wall surfaces. If you see the reflection of one of your speakers in the mirror, it indicates a good location for absorption treatment. Typically, these locations will be halfway between your mix position and the speakers. The ceiling can also contribute first reflections, so absorption on the ceiling is appropriate.
Step 8 Bass Trapping
As I’ve already said, low-frequency energy tends to congregate in the corners of the room, so bass trapping is most effective when placed in the corners. In particular, the upper portions of your corners are the most important area to address, as furniture and people break up the sound in the lower level of your room, making the upper- level more important to target. Bass trapping products should be applied to at least the top 4 feet of each vertical corner.

Step 9 Select the Proper Acoustical Treatment for You
Acoustical treatment is available in various shapes, sizes, colors and materials. Many of the available options perform the same acoustically; they just offer a difference in aesthetics. By researching the options available, you can determine which ones will fall within your budget range while complementing the room’s design.

Step 10 Get Professional Help
There are many resources available to help you with the acoustical design of your room. Auralex offers a Free Personalized Room Analysis Service that takes the guesswork out of the acoustical treatment process. Simply fill out the form located at www.auralex.com and fax it in along with a diagram of the room outlining all of the details of your space. A report will be sent back to you offering you suggestions for how best to acoustically treat your space.

Your Guide

Gavin Haverstick
Lead Acoustical Engineer
Auralex Acoustics, Inc.
Gavin Haverstick is the lead acoustical engineer at Auralex Acoustics, manufacturer of acoustical treatment products ranging from sound quality control devices (absorption, diffusion, bass trapping) to sound transmission control products (construction materials). Gavin has worked for Auralex for eight years and has been involved in the acoustical design/analysis of over 3,000 challenging spaces, including recording studios, edit suites, conference rooms, home theaters, industrial facilities, gymnasiums, houses of worship and cafeterias. He has a degree in Mechanical Engineering from Colorado State University with a focus in robotics.
Gavin Says Keep in Mind…
Acoustics is one of the most important aspects of any room, but unfortunately, also one of the most overlooked areas of room design, often because most people just don’t know where to begin. However, proper acoustical treatment for editing suites is crucial to the editing process. Having a controlled and acoustically accurate environment will improve the quality of your work and result in mixes that translate well to other systems. After you’ve applied acoustical treatment, you can spend less time working on a mix. You’ll be able to trust what you hear in your room, be able to reduce the amount of listener fatigue, and work more efficiently with heightened concentration on the details in your mix.
Auralex Acoustics, Inc.
6853 Hillsdale Court
Indianapolis, IN 46250
ph. 800.959.3343
gavin@auralex.com
Tools Used: Speakers, mixing equipment, acoustical treatment (absorption, diffusion, bass trapping tiles)
Did you enjoy this article? Sign up to receive the StudioDaily Fix eletter containing the latest stories, including news, videos, interviews, reviews and more.


Leave a Reply